Chasing The Stars: A Night Photography Tutorial II
Part II – Trip Planning & The Night
TRIP PLANNING
Before you can begin shooting night images you first need to figure out what it is you'd like to capture, as well as when and how to capture it. Since night images use much longer shutter speeds than daytime images there are a few different factors that must be taken into consideration, like clouds, light pollution, and the position of the moon. In this section I will cover some of these factors and how to think about them before you head out.
What to shoot?
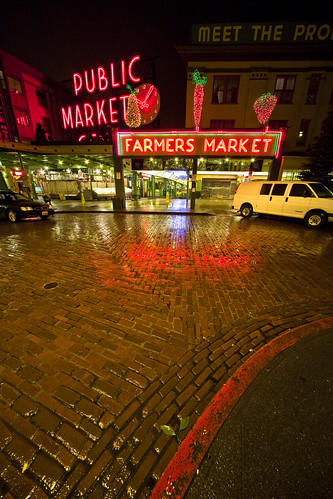
 This is a pretty open question, and there an infinite number of possible answers. My personal favorite things to capture are startrails, clouds, and the milky way. Other possibilities include traffic, amusement park rides, or pretty much anything involving the movement of light.
Tip: One thing that is very important to keep in mind while shooting night images is that you are capturing light not darkness. For example, if it is really dark out and you shoot a 10 minute exposure and stand in front of the camera for say a minute of it, you probably won't be able to tell you were there. But, if you do the same thing and shine a light on yourself then you will show up bright as day (actually, you'll probably be over exposed).
This tutorial will focus primarily on shooting startrails, but many of the techniques and ideas apply for most night images.
Where to shoot?
Again, this is a question with limitless possibilities. However, there are certainly some areas that are better suited for shooting long exposures. These places include mountains, deserts, and beaches. These locations tend to have less light pollution so you are able to see more stars.
When considering locations you must also consider what type of weather you might encounter as well. For instance, beaches almost always have high relative humidity during the night time hours due to the decreasing temperatures and close source of moisture. This can lead to lenses fogging up quickly overnight. (my anti-fog gear will be discussed in another upcoming post). This problem is also common in the mountains where the temperatures drop rapidly overnight. Another common weather issue is incoming clouds when you are trying to shoot startrails. It is very handy to check out your area's satellite imagery and forecast (available from your local National Weather Service office) prior to heading out.
 When to shoot?
This is very important question that often is forgotten in the planning of a night photography trip. If you know your destination well you can probably find your shooting spot in the dark fairly easily, but if you are headed to a new location it is a good idea to arrive before sunset so you can get a feel for the area and find a good composition (since this is often more difficult to do at night).
Another consideration is the moon. I can't tell you how many times in my early days I arrived at a location and started shooting just to find that the moon was rising right through my image or was moving just out of frame but caused some terrible lens flare. It is important to know where the moon is (or will be) relative to what you would like to shoot and to use that light to your advantage. Since the moon is on a regular 4-week(ish) cycle you can plan this part out well in advance. A good resource for moon phase/rise/set times can he found here. You can also find sunrise/sunset times at that link as well. This is also handy since you'll want to know how long of a window you will have to shoot.
How long of a shot?
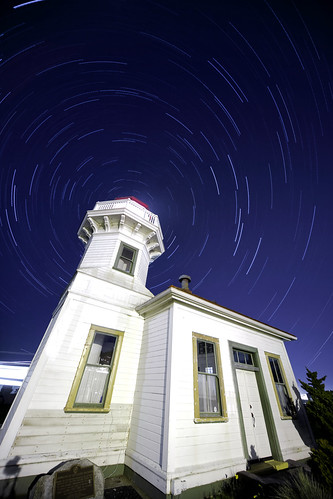
This question is strongly dependent on what you'd like to shoot. For traffic images, 30 second is generally plenty long to get nice fluid motion. Clouds tend to require somewhat longer exposures ranging from 30 seconds to 5 minutes depending on their height and speed (lower clouds usually appear to move faster when viewed from the ground and thus require a shorter exposure). Startrails (either single exposure or stacked exposures) require even longer shots. Although you can start seeing "trails" in a one minute exposure, I generally make it a rule that true startrails require a minimum of 30-45 minutes of exposure time. Most of my current startrail shots range from 1-2 hours, while my longest to date is 5 hours and 37 minutes. It is important to note that shots of 1 hour or longer on most cameras require a battery grip or external power supply.
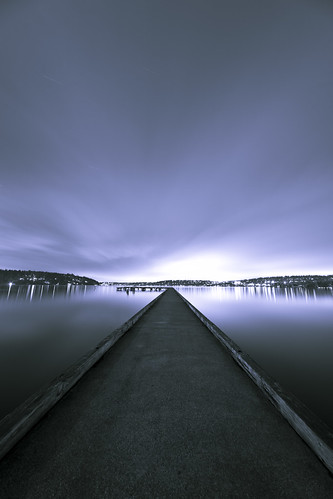
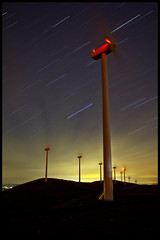 |  |
| 32 min. | 5 hr. 37 min. |
THE NIGHT
Composition
Finding a interesting and creative composition tends to be much more difficult at night than during the day. This is because it can be nearly impossible to see through your camera's viewfinder in the dark. I find it helpful to take a few short exposures (30 seconds to one minute) at a high ISO (3200 or higher) in order to dial in my composition. I generally combine this with the test shot procedure I will discuss later in this tutorial.
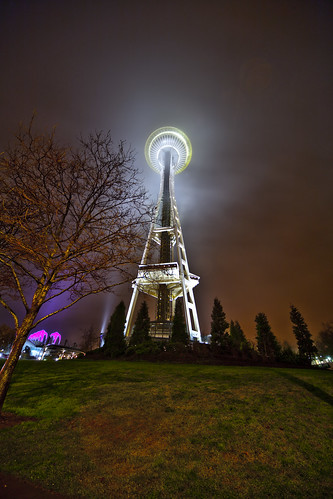
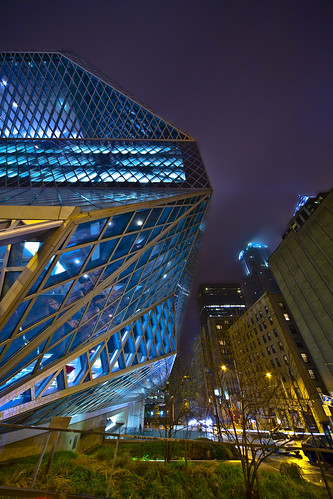
For startrails is it very important to know where Polaris (the North Star) is relative to your camera, and how to place it as a creative element within (or outside of) your image. The stars rotate about an axis centered at (well... very close to) Polaris. If you include Polaris within your frame you will end up with stars that create a circular or elliptical pattern (depending on the distortion of your lens). On the other hand if your camera is facing away from Polaris the stars will be aligned in a more linear pattern.
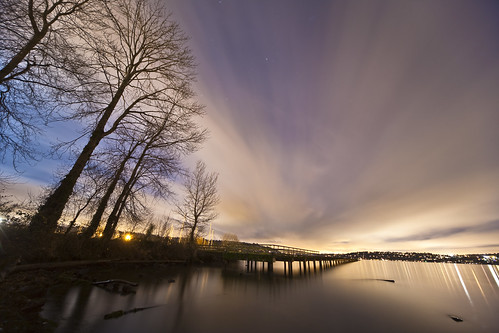
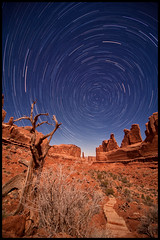 | 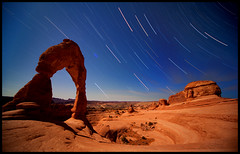 |
| Facing toward Polaris | Facing away from Polaris |
 So how do you find Polaris? Well, there is a nice little webpage that goes over a couple of ways to find it. I find it easiest to find the big dipper and trace a line from the last two stars (in the "cup" part) towards the "handle" of the little dipper. The last star at the end of the handle of the little dipper is Polaris.
 Another feature of the night sky to note is that right at the horizon there is usually and area that is brighter. This is due to the scattering of light from the stars, cities, etc. You also won't see stars right at the horizon because of this scattering, so the stars seem to appear from nowhere a couple of degrees above the horizon. This feature is sometimes easy to overexposure and generally doesn't give the best startrails so I wouldn't suggest making it a focal point in an image.
Lastly, it's easy to get wrapped up in capturing the night sky, but don't forget the other useful elements of composition (eg. get low, include a foreground, rule of thirds, etc.) just because it's hard to see.
Test Shots
The most useful technique I’ve found for shooting night shots is first finding the proper exposure by taking test shots. I’ve met quite a few photographers who will set up their camera for a long exposure and fire away only to find that they have either under- or overexposed their shot. Taking test shots should be the first thing you do after you find a composition that you like. In general your test shot will be with the aperture wide open (or around f/4) and at a high ISO. I have dedicated C3 on my mode dial as a general starting point for long exposures. The settings I have for this mode are:
- Shutter Speed: 30 seconds
- Aperture: f/4
- ISO: 1600
- Delay: 2 seconds
- Long exposure noise reduction: OFF
After taking the first test shot I make adjustments to the ISO as necessary to find the proper exposure. The proper exposure is one that has the correct amount of light you'd like in the finished product but is probably shot at a much higher ISO and much lower shutter speed than you'd like. Make a note of these exposure settings, either in your head or on paper. When you've found the proper exposure, you should delete these test shots if you're worried about space on your memory card.
SINGLE LONG EXPOSURES:
 First start with the test shot procedure outlined above. Once you have the proper exposure at a high ISO you are ready to translate this exposure into the actual shot settings. Change your mode dial to the proper mode (Manual or Bulb depending on the camera) and turn on long exposure noise reduction (Remember this will double the total shot time). If you are shooting startrails I would suggest only changing the ISO and keeping the aperture around f/4 in order to pick up the light from the stars while still being reasonably sharp. Otherwise change the aperture to get the desired depth of field and then adjust your ISO to the desired noise level. This leaves shutter speed, here’s where the math comes in and you have to recall the light doubling (or halving) rules.
Aperture & ISO: Each move to the right halves the amount of light reaching the sensor. So to keep the same exposure you’d have to double the shutter speed with each step.
- f/1.4 - f/2 - f/2.8 - f/4 - f/5.6 - f/8 - f/11 - f/16 - f/22
- 25600 – 12800 – 6400 – 3200 – 1600 – 800 – 400 – 200 – 100 – 50
Example:
Test shot settings:
- Shutter speed: 30 seconds
- Aperture: f/4
- ISO: 3200
If I knew that I wanted to use f/8 and ISO 100 here’s the math:
- Going from f/4 to f/8 is 2 halvings
- Going from ISO 3200 to 100 is 5 halvings
- I need to double the shutter speed 7 times, starting at 30 seconds I get:
- 1min – 2min – 4min – 8min – 16min – 32min – 64min
So the proper exposure is:
- Shutter speed: 64 minutes
- Aperture: f/8
- ISO: 100
Dial in the proper settings (if you have a timer cable release you can actually dial in the exact shutter speed, otherwise check your watch), and fire away!
STACKED LONG EXPOSURES:
 The procedure for stacked long exposures is very similar to single long exposures above. There are a few differences though first of which is to make sure that you have long exposure noise reduction turned off. If you leave this on then there will be gaps between each image and the star trails will look like dashed lines instead of solid lines. Next you will note from above that a lot of the noise from using a higher ISO will be averaged out during the stacking process so feel free to use a higher ISO (up to around ISO 1600 on a Canon 5D Mark II). Keep in mind, however, that doing this will reduce the sharpness and saturation of the overall image. Again I would recommend using an aperture close to f/4 to keep the stars bright and the image reasonably sharp.
If you have a cable release (as opposed to a timer shutter release) then you will be limited to stacking 30-second images. Make sure that you change your shooting mode from single shot to continuous, this way when the cable release is locked down it will fire one 30-second shot after another.
If you have a timer cable release then you have the freedom to choose the length of each exposure. This is nice for a couple of reasons; you can choose a lower ISO and regain some saturation and sharpness back, and it doesn’t take up as much memory or time during post processing since you will have fewer shots if each shot is longer. One note--I would advise against setting the exposure for too long as the fewer shots you have, the less averaging occurs, so more noise may creep into your image. I usually try to get at least 10 shots to average together.
Now you are ready to dial in the proper exposure and fire away!
During The Shot
So you're all set up and ready to fire. There are a couple other things you should think about before you start shooting.
Should I set a delay?
If you need to cross in front of your camera (especially with a flashlight) after starting, then you'll want to set a delay. You don't want to have this floating light through your shot because you didn't want to stand in the middle of a snow field for 3 hours when your car is only 1000 feet away.
Are there lights that could come on during the shot?
This is something to watch for if you're shooting with other people. You don't want someone to turn on a flashlight (or their car headlights) in or around your shot. Unless you'd like to spend several hours in Photoshop afterward to get rid of the light. Coordinate!
Will it fog up?
This is a tricky one. Keeping a lens from fogging up is difficult. I've found that keeping the lens warm helps delay the formation of lens fog. I found that the air activated hand warmers wrapped in a sleeve around my lens works pretty well for moderately cold temperature (above freezing). I still need to find a good solution for colder temperatures.
Will I get bored?
One reason people often give for not shooting startrails is the amount of patience it requires if you go out alone. I will confess that there have been times where I've been bored out of my mind while waiting for a shot to expose. Then I bought a smartphone, which changed everything. Now when I'm out shooting I can watch Photoshop tutorials on YouTube while I wait! If I'm out of cell range, I can watch movies or listen to music on the phone, and if the battery dies, a magazine is always a good backup. However, the best treatment for boredom is to BRING A FRIEND!
 Coming up next in Part III - Post Processing
RAW Processing - ACR/Lightroom/Aperture/etc.
Startails - Stacking & Foreground Replacement
Viveza 2 - General Ideas for Night Photography
Dfine 2.0 - General Ideas for Night Photography
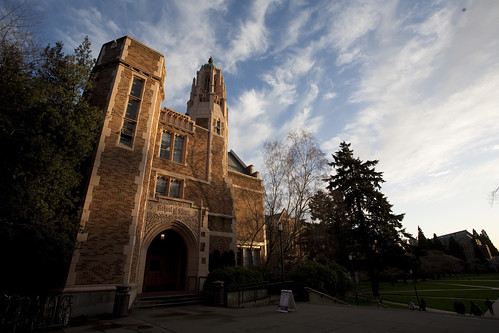
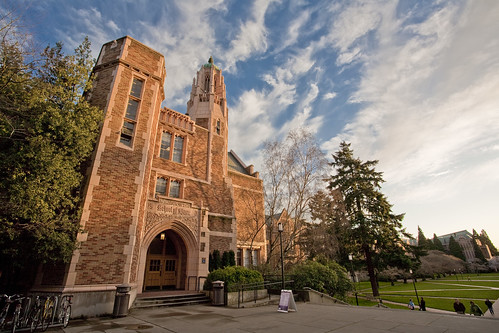
Mouse over to see the unedited image.